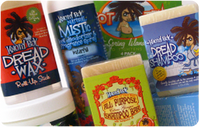
Please Note: Either your browser does not support CSS (Cascading Style Sheets) or it is disabled. To learn more about CSS, click here.

Site Map
Contact
view cart View Cart
Send this page to a friend


Watch the Knotty Boy How to Make Dreadlocks instructional video here, or continue on for the same info!


Welcome to the first video in our series on How to Make, Maintain and Remove Dreadlocks - the Knotty Boy Method. This same How to Make Dreadlocks Step-by-Step video is now also available on DVD, offering the convenience of being able to view this video from any DVD player, seriously increased video quality and DVD-only hilarious outtakes of our Knotty Boy stylists that make it worth every penny.

Or, simply enjoy this free version of How to Make Dreadlocks Step-by-Step with our compliments, for your viewing and learning pleasure!


Stuff you'll need to start dreadlocks:

- Three inches of hair or longer to start dreadlocks using Knotty Boy Dread Wax. (For people attempting to start dreads without it, you will need hair at least 6 inches or longer, and a lot of luck and patience for the next few years! See the dread wax page for more about that.)

- A good, patient friend or two or five to help you start your dreads. You can start your dreads yourself, but having help makes the job go much faster and easier.

- A jar o'Knotty Boy Dread Wax .

- A comb with closely-spaced teeth , like a good strong plastic comb or a pet flea-comb (not used on your pet, dum-dum) will work pretty well, too. But the best are our Knotty Boy Professional Dreading Combs.

- Old towel to wipe your goopy hands on.

- Hair claws, clips or elastics to keep the other sections of hair out of the way.

- All the Bob Marley records you can find or borrow to play during the first hours of your Dreadlock Holiday. (May we recommend a personal favorite, "Catch a Fire," for this most important event?)

- A camera for taking your before and after pictures to send us for a coveted place in our famous Happy Nappy Dreadlock Gallery!

- And time, patient time for the starting of your dreads!

Some Additional Notes:

- For people with hair that has little to no texture (ie. bone-straight ), a good thing to do the night before dreading is to wash your hair with either the Knotty Boy Dread Shampoo Bar, or the FREE Knotty Boy Bee Washed Pre-Dreading and De-Waxing Soap found in every Knotty Boy Dreadlock Starter Kit (with the exception of the Simple Starter Kit). No conditioners! Then towel dry very well and braid the hair slightly damp into a few tight braids. Sleep with them in overnight, then the next day before you begin dreading, take out the braids and brush the hair to make it as frizzy as possible. This will help the dreads take to your hair much better. Tip! You can also use an '80's style crimper on dry, washed hair to achieve the same effect when time is a constraint.

- For all other hair types, to strip the hair of all oils and dirt, we recommend that you wash your hair thoroughly the night before with either the Knotty Boy Dread Shampoo Bar, or the FREE Knotty Boy Bee Washed Pre-Dreading and De-Waxing Soap found in every Knotty Boy Dreadlock Starter Kit (with the exception of the Simple Starter Kit). No conditioners! Then blow dry or let dry overnight. The next day, brush the hair out well to make it as dry and frizzy as possible, and then begin dreading!


How to Make Dreadlocks: Step By Step Instructions

Step 1

Put on the Bob Marley record of your choice - if it's "Catch a Fire", you and your friends may take the next three minutes to put on your flashdance ass-pants and shake your bootay to "Concrete Jungle". Also while you're at it, please take a moment to snap a before-picture of the soon-to-be-dreaded victim so you can send it to us along with an after pic for the website! Hey, tune's over! Get back to work, you dirty, good-fer-nothin' hippies!

Step 2

How to dread your hair step by step instructionsTo start, you can either section the hair into uniform sections, or just start at the back and work forward, grabbing locks that are about the size of your index finger, or as desired. (Note that the shorter the hair, the skinnier the dread must be, but fret not, they will grow together and get bigger as time goes by.) If you chose to make uniform sections, try to section in a brick-lay pattern, so the sections are staggered making each one slightly off-center from the section below and above it. This makes the locks look more pro and uniform and minimizes naked scalp-gaps shining through. However, it does take a bit longer to separate them all out. No biggie - you're gonna be here for the next 4 or more hours anyway! What's another 15 minutes? bwaaahaha! 

We also recommend that to avoid the blinding part down the middle of your head, grab sections randomly from either side of that part and dread like that, criss-cross style. Jump! Jump!

Step 3

How to dread your hair step by step instructionsTake the first section of hair, and with the dread comb, "back-comb" the hair like crazy starting from the very scalp and working your way down to the tips. Back-combing is the process of combing the hair TOWARDS your scalp. This process will tease and tangle up the hair. If you are unsure of this method, just ask older Moms out there about back-combing and the response you get will be, "Oh my, like we did back in the 60's with the beehives. Let me get out the photo albums. Oh, I remember when Drexel Murdock, that devil, asked me to the Junior/Senior Banquet..."

It's actually very important to make sure the hair is really good and knotted at the base, next to your scalp, because that is where the dreads must start to come together on their own when your hair grows another inch or so. This phenomenon is also known as those #!@*! roots. See the FAQ page of the website for everything you ever wanted to know about those roooots, bloody roooots that never dread. PLEASE DON'T e-mail us about them, just read the FAQ section about them, that's everything we know right there!

** Update! We've found that a really good way to keep the roots tighter for longer is to braid each section a few times tight against the scalp before beginning to backcomb, then the root is braided and doesn't get loose as fast as without the braid! Woo! **

So anyway, do this back-combing thang a couple of times until you feel it's sufficiently knotted and tangled, then twist that lump of hair into a semi-dreadlock. You may be surprised to find this dread is a lot shorter than the rest of your un-dreaded hair, especially if you have quite fine hair. Don't worry, you're doing everything right. It's normal for dreads to end up about 1/3rd shorter that the length you originally started with. 

Another thing to note is this process of pulling and back-combing my cause you some occasional scalp pain, but, hey! No pain, no nappy dreads, baby!

Step 4

Now, open the Knotty Boy Dread Wax and remove the dust-cover. Breathe in the delicious aroma of clover fields and fresh beeswax - soon your whole head will be swimming with this fantastic fragrance and you might even fall down. Well, it could happen...  

OK, pay attention. Inside, the surface of the wax will appear hard and smooth, so take your fingernail, tip of your comb, spoon, whatever - and just break the surface in, using your fingers to start softening the wax up, making it more workable and pliable. It may take a bit of muscle to get it going at first, but it's better to have the wax this way than a product that is too soft and greasy and gets all over your face when you sleep at night. Yummy-yum!

Step 5

How to dread your hair step by step instructionsNow that you've got your goop ready and your new dread knotty, take a blob of Knotty Boy Dread Wax on your finger (work out any little clumps of the wax) and start massaging it into the tangled hair, starting, again, from the scalp and working down to the ends. Take more blobs of wax as you need it, waxing and twisting as you go down the lock- but don't use so much that it would be a sticky mess in your friend's hand if he/she were to give your new dread a playful tug. Gross. Use your good judgment about how much your dreads need to keep them together in the beginning.

Step 6

Once you've got your new lock sufficiently backcombed, waxed and twisted, you want to give it what we call a palmroll. The technique known as palmrolling is done by taking the new lock, and you guessed it, rolling it quickly between your palms, thereby getting it tighter, more knotted and shaping it into a very nice-looking, well-groomed dreadlock.

Step 7

Now you just keep repeating the backcomb-wax-twist-and-roll process the whole live-long day! Well, it won't really take all day... actually, yes, it will...well, about 3-5 or more hours of it anyway... But hey! The coolest thing about dreads is that 9 times out of 10 people are SO excited about how different and great it makes them look once they're done, it just doesn't even matter anymore how long it took to get them. Don't worry, it won't be long now...

Additional Secret Tricks!

- Run a blowdryer over your new locks once they're all in to help melt Knotty Boy Dread Wax into the core of the lock, where it'll bind all that loose hair together and do it's job to get you locking faster and tighter.

- If you want your dreads to have blunted tips rather than wispy ends, you can take the loose hairs at the end of each lock and roughly pull them apart, thereby drawing the knots up into the bottom of the lock, making it tighter, and also breaking off the stray hairs. Don't worry, it may not feel right to intentionally damage your hair like this... but... did you miss the part where you backcombed your entire head? You can also 'scribble' the end of the lock into the palm of your hand in a circular motion to ball up the end hairs and make the tip more blunted.

All done? Well, hot dang...!


Welcome to the Knotty Family!

Ozzie
See the five-year dreadlock progression of our littlest Knotty Boy, Ozzie, here!

Congrats, new Knotty Bro or Sista! Them dreadies are finally done! Now read on for some other really useful tips about immediate dreadlock after-care, and don't forget to snap an After photo of your new locks to submit to our Happy Nappy Gallery!


Tips for Immediate Dreadlock After-Care

Rewaxing
After the first shot at getting them all locked up, sit down and re-wax each one as best you can at LEAST twice a week to begin with, if not every few days, but use your judgement. You'll find that the first few days things will feel a bit tacky and sticky up there, but as your dreads start to lock in the next few weeks and aren't as soft anymore, things dry out a lot. After they've started to form into real dreads (anywhere after about 2-6 months), you can use Knotty Boy to get the loose hair back into the main dreads and goop them up whenever you feel it's necessary, and when you're at that stage, the waxiness lasts for only about a day after you reapply it.  Some people will also use their comb to backcomb the loose hair into the dreads again, and others find continuing to palmroll their dreads to be very helpful. Do whatever works best for you and your hair type.

NOTE - You never, ever want to apply wax to wet or damp dreadlocks. Doing so seals in the moisture, which in turn begins to start a colony of mold and mildew growing inside those spongy locks. Know that wet-dog, old-musty-towel smell eminating from some dreadheads out there? Yep, you guessed it. That's either because of dreads that have not been allowed to dry thoroughly between washings, waxing over wet locks or both. More about this on the Ongoing Dreadlock Care page.


How to photos for doing dreadlocks
Lovely Laura walks you through her dreadin' experience. Check it out! »

Sleeping with Dreads
Also, a very good thing to do for sleeping after you've just waxed is to either find an old pillow case that you don't care about to put on your pillow for the next while, or pin a towel to the pillow. Knotty Boy isn't slimy or anything, but it may get your pillow a bit waxy after just having put it in your hair. If you're hair is long enough, tie it back, and if it's short you can always wear a Knotty Boy tam or hat, or nylon stocking to keep it away from your face when you sleep. Doing this will also help keep them from rubbing apart and getting really fuzzy when you sleep.


Continue on to the Ongoing Dreadlock Care page...

Be sure to also check out our massive FAQ pages for even more help with starting and maintaining your new dreads!

And Send us Pictures!!!

Jim

KnottyJim has put together a fantastic gallery of his dreadlock development over one year here! Thanks, Jim!

Yeah, yeah, yeah, email or snail-mail us before and after pictures of you wif your new dreads and we'll put them in the Happy Nappy Dreadlock Gallery ! Don't be shy if your dreads are short or new - you'll be an inspiration for other new dreadies out there to see that you're going through the same normal stages that they are with their own dreads! 

Also, send us your drawings and artwork, and we'll use them to decorate up our Art Gallery, too!